Hosting on GitLab
-
Add and commit everything:
$ git add -A && git commit -am "shard complete"
- Create a GitLab project with the same
nameanddescriptionas specified in yourshard.yml.
-
Add the remote: (Be sure to replace
<YOUR-GITLAB-USERNAME>and<YOUR-REPOSITORY-NAME>accordingly)$ git remote add origin https://gitlab.com/<YOUR-GITLAB-USERNAME>/<YOUR-REPOSITORY-NAME>.gitor if you use SSH
$ git remote add origin git@gitlab.com:<YOUR-GITLAB-USERNAME>/<YOUR-REPOSITORY-NAME>.git
-
Push it:
$ git push origin master
Pipelines
Next, let's setup a GitLab Pipeline that can run our tests and build/deploy the docs when we push code to the repo.
Simply, you can just add the following file to the root of the repo and name it .gitlab-ci.yml
image: "crystallang/crystal:latest"

before_script:
  - shards install

cache:
  paths:
  - lib/

spec & format:
  script:
  - crystal spec
  - crystal tool format --check

pages:
  stage: deploy
  script:
  - crystal docs -o public src/palindrome-example.cr
  artifacts:
    paths:
    - public
  only:
  - master
This creates two jobs. The first one is titled "spec & format" (you can use any name you like) and by default goes in the "test" stage of the pipeline. It just runs the array of commands in script on a brand new instance of the docker container specified by image. You'll probably want to lock that container to the version of crystal you're using (the one specified in your shard.yml) but for this example we'll just use the latest tag.
The test stage of the pipeline will either pass (each element of the array returned a healthy exit code) or it will fail (one of the elements returned an error).
If it passes, then the pipeline will move onto the second job we defined here which we must name "pages". This is a special job just for deploying content to your gitlab pages site! This one is executed after tests have passed because we specified that it should occur in the "deploy" stage. It again runs the commands in script (this time building the docs), but this time we tell it to preserve the path public (where we stashed the docs) as an artifact of the job.
The result of naming this job pages and putting our docs in the public directory and specifying it as an artifact is that GitLab will deploy the site in that directory to the default URL https://<YOUR-GITLAB-USERNAME>.gitlab.io/<YOUR-REPOSITORY-NAME>.
The before_script and cache keys in the file are for running the same script in every job (shards install) and for hanging onto the files that were created (cache). They're not necessary if your shard doesn't have any dependencies.
If you commit the above file to your project and push, you'll trigger your first run of the new pipeline.
$ git add -A && git commit -am 'Add .gitlab-ci.yml' && git push origin master
Some Badges
While that pipeline is running, let's attach some badges to the project to show off our docs and the (hopefully) successful state of our pipeline. (You might want to read the badges docs.)
A badge is just a link with an image. So let's create a link to our pipeline and fetch a badge image from the Gitlab Pipeline Badges API.
In the Badges section of the General settings, we'll first add a release badge. The link is: https://gitlab.com/<YOUR-GITLAB-USERNAME>/<YOUR-REPOSITORY-NAME>/pipelines and the Badge Image URL is: https://gitlab.com/<YOUR-GITLAB-USERNAME>/<YOUR-REPOSITORY-NAME>/badges/master/pipeline.svg.
And now if the pipleline has finished we'll have docs and we can link to them with a generic badge from shields.io.
- Link:
https://<YOUR-GITLAB-USERNAME>.gitlab.io/<YOUR-REPOSITORY-NAME> - Image:
https://img.shields.io/badge/docs-available-brightgreen.svg
Releases
A release is just a special commit in your history with a name (see tagging).
According to the Crystal Shards README,
When libraries are installed from Git repositories, the repository is expected to have version tags following a semver-like format, prefixed with a
v. Examples: v1.2.3, v2.0.0-rc1 or v2017.04.1
GitLab also has a releases feature that let's you associate files and a description with this tag. That way you can (for example) distribute binaries.
As you'll see from the releases docs, you can either create an annotated tag along with release notes/files in the UI:
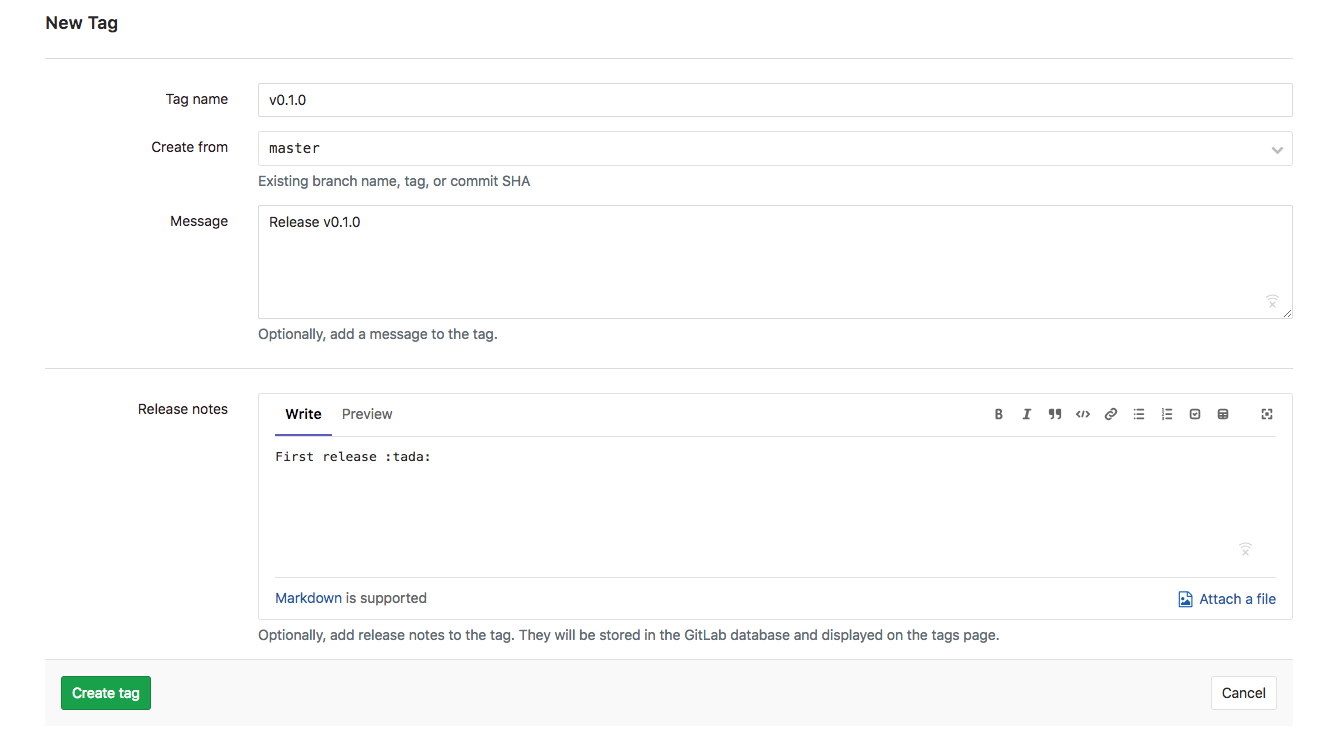
or you can create the tag from the command line like so:
$ git tag -a v0.1.0 -m "Release v0.1.0"
push it up
$ git push origin master --follow-tags
and then use the UI to add/edit the release note and attach files.
Best Practices
- Use the
-aoption to create an annotated tag for releases. - Follow Semantic Versioning.
Release Badge
If you'd like you can also add a shields.io badge for the release. GitLab doesn't have full support for this kind of thing, and until someone adds a version badge for gitlab to shields.io, we'll have to just code in the version number in the URLs directly.
- Link:
https://img.shields.io/badge/release-<VERSION>-brightgreen.svg - Image:
https://img.shields.io/badge/release-<VERSION>-brightgreen.svg
where <VERSION> is the version number prefixed with a v like this: v0.1.0.
Mirror to GitHub
At the moment, crystalshards.xyz only uses the GitHub API, so if you want your library to be indexed on that service you can set up a "push mirror" from GitLab to GitHub.
- Create a GitHub repository with the same name as your project.
- Follow the instructions here: https://docs.gitlab.com/ee/workflow/repository_mirroring.html#setting-up-a-push-mirror-from-gitlab-to-github-core
- Edit your GitHub description. The first few words of this description will show up in the search results of
crystalshards.xyzbut not the whole string, so for example, you could use the following- Description: Words that are the same forwards and backwards. This is a mirror of:
- Link: https://gitlab.com/
/ /
This is a push mirror and that means changes will only propagate one way. So be sure to let potential collaborators know that pull requests and issues should be submitted to your GitLab project.